Being asynchronous, ability to handle millions of users without slowing down the server makes it the number one choice in many enterprises to deploy their systems. This guide demonstrates how to install, and configure Nginx web servers with ease. The guide uses Ubuntu 18.04 as the version because it's LTS; hence it has a long-term support which is required in a production environment. Installing and configuring a Nginx web server are relatively easy, but it involves a number of steps.
Installation
These instructions were written for Ubuntu 18.04 LTS version, and thus it should not be used in a different Linux flavour unless the same commands work over there as well. It's encouraged to install Nginx in a regular user account with sudo permission in order to the mitigate security risk. However, this article doesn't demonstrate how to create a user account as it's out of its scope.
- Prior to install Nginx, update the local package information, then update the packages with the following commands. It makes sure latest version of Nginx is retrieved from the repository (server) when Nginx install command is used. Dist-upgrade command intelligently handles dependencies to prevent incompatibility problems among different packages.
- Install Nginx with the following command
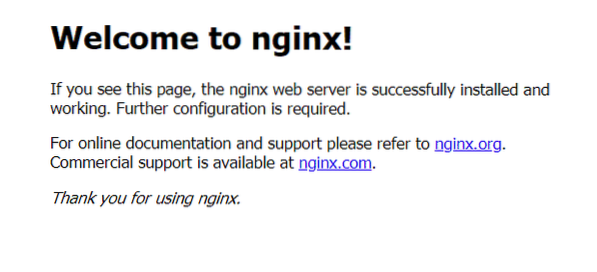
- The installation only requires 3 main commands to be used, then Nginx is installed in the server. Since in this guide, Nginx is used as a web server, the index.html is created as soon as Nginx is installed, and it can be accessed through the external IP address of the server.
http://IPAddress
- Even though it's installed, it's important to make sure Nginx service automatically starts its own if in case the server is restarted for some reason. It can be done as following.
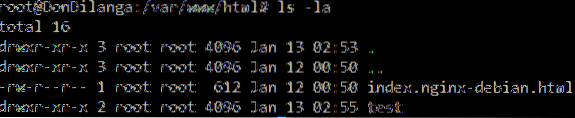
- Use the following two commands to adjust the file system permissions. The first command assigns currently logged in user's name to the file's permission. If it's root, then it's root, if it's a custom name, then its name. With the second command the file's permission is set. Since permission for “all users” is set to R, the file can be read by anyone, which is recommended for publicly accessible files. W standards for write permission, which is required for owner to make changes to the file, and It comes handy when a file is modified through a script while being in the server, such as on the WordPress dashboard.
sudo chmod -R 755 /var/www/example.com
Configuration
Installing Nginx is simple as described above, but configuration requires more effort, and it also depends on the requirements and environment of the server. This guide demonstrates how to configure a nginx web server for one domain, how to adjust basic settings, how to set up SSL/TLS, which is required by Google to improve the rank of the web site, and finally what commands are involved in setting up a Nginx server.
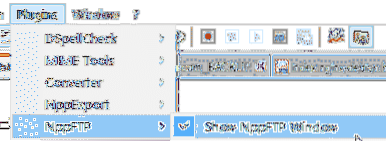
- Use the following command to open Nginx default file via nano editor. Default file is automatically created when Nginx is installed at first time, and defines the configuration for a web server. This configuration contains a server block which is dedicated for one domain name, and processes the requests to its domain as per the rules within its boundary. Nano editor is just a console editor which helps in opening text files with ease. It's highly recommended to use a better editor like Notepad++ with NppFTP extension as it's quite user friendly compared to a console text editor.
The configuration file contains a few important lines as seen in the following code snippet.
- Listen directive specifies the port number of the IP address to listen. For connection encrypted web servers it's 443, and for non-encrypted web servers it's 80. Default_server makes it the default server out of all the sever blocks, meaning this server block is executed if request's header field doesn't match with any of the specified server names. It's useful to capture all the requests to the server regardless of the host name (meaning domain in this case).
- Server_name specifies the host name, usually the domain name. It's recommended to use both naked, and www flavours of the domain, for instance…
- Root directive specifies where the web pages are located in the file server, for instance Index.html, and all other sub folders of a web site. The directive only requires the path to the root folder of the web site, the rest is taken relative to that.
- Index directive specifies the index file's name, meaning the file that opens up when the host name is entered in the address bar of the web browser.
- The location block is useful to process directives under the host name, for instance google.com/images, /videos. The / captures the root directive of the domain name. try_files directive tries to serve the content (file, folder) or throws not found message if the resource is not available. If the /videos directory needs to be processed, then use location /videos.
listen 80 default_server;
listen [::]:80 default_server;
server_name _;
root /var/www/html/;
index index.php index.html index.htm;
location /
try_files $uri $uri/ =404;
- It's recommended to restart the server once it's configured at first. Restarting the nginx service, reload the configuration file as well. If a simple change was made in the configuration file, using reload is enough too instead of restart to prevent the connection from dropping to the server.
- Nowadays it's important to encrypt the connection to the website in order to improve the rank of the website in the Google index. Encrypting can be done by implementing SSL/TLS certificate in the web server. There are numerous certificates available in the market, both paid, and free, but this guide uses a free certificate known as let's encrypt. It's free of charge but required to renew the certificate once in every 3 months compared to a year in commercial certificates. The following command adds certbot PPA (personal package archive) to the system. These PPAs are hosted in launchpad.net, and when apt-get is used, they are downloaded to the system immediately.
- The following command downloads and install certbot flavour for nginx. As mentioned above, it's downloaded from launchpad.net.
- Once it's installed, use the following command to enable SSL/TLS for the specified domain name, and its www flavour. This should be the same domain configured in aforesaid steps. If the domain is not configured, make sure it's done prior to this step.
-d www.domain.extension
- When the SSL/TLS was installed as above, restart the server again to changes take effect.
- It's also recommended to use configuration stated in the following website as it tweaks the SSL/TLS configuration for a specified requirement. The important options in the following website are, modern, intermediate, and old. Modern option makes the connection highly secure, but at the cost of compatibility, and thus the site won't load on older we browsers. Intermediate option balances out both compatibility, and security, and thus recommended for most web sites. Old type is for legacy systems. It's not recommended for production sites, but for warning users when they visit the site from ancient web browsers, like Internet Explorer 5.
https://ssl-config.mozilla.org/
Conclusion
Nginx is a proxy server, reverse proxy server and load balancer, and due to its high performance, it's often used in enterprises to serve their web services. This guide teaches how to install and configure a Nginx server for the first time on an Ubuntu server with ease. Installing, and configuration are not that difficult as all the commands abstract out the complicated tasks under the layer. All in all, there is no reason to not use Nginx unless the business expects a different requirement that Nginx doesn't offer.


