This article will show you how to set up Selenium on your Linux distribution (i.e., Ubuntu), as well as how to perform basic web automation and web scrapping with the Selenium Python 3 library.
Prerequisites
To try out the commands and examples used in this article, you must have the following:
1) A Linux distribution (preferably Ubuntu) installed on your computer.
2) Python 3 installed on your computer.
3) PIP 3 installed on your computer.
4) The Google Chrome or Firefox web browser installed on your computer.
You can find many articles on these topics at LinuxHint.com. Be sure to check these articles out if you need any further assistance.
Preparing Python 3 Virtual Environment for the Project
The Python Virtual Environment is used to create an isolated Python project directory. The Python modules that you install using PIP will be installed in the project directory only, rather than globally.
The Python virtualenv module is used to manage Python virtual environments.
You can install the Python virtualenv module globally using PIP 3, as follows:
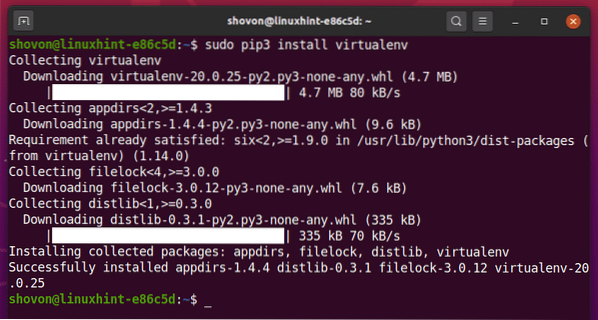
$ sudo pip3 install virtualenv
PIP3 will download and globally install all the required modules.

At this point, the Python virtualenv module should be installed globally.
Create the project directory python-selenium-basic/ in your current working directory, as follows:
$ mkdir -pv python-selenium-basic/drivers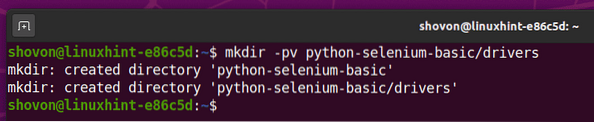
Navigate to your newly created project directory python-selenium-basic/, as follows:
$ cd python-selenium-basic/
Create a Python virtual environment in your project directory with the following command:
$ virtualenv .env
The Python virtual environment should now be created in your project directory.'

Activate the Python virtual environment in your project directory via the following command:
$ source .env/bin/activate
As you can see, the Python virtual environment is activated for this project directory.

Installing Selenium Python Library
The Selenium Python library is available in the official Python PyPI repository.
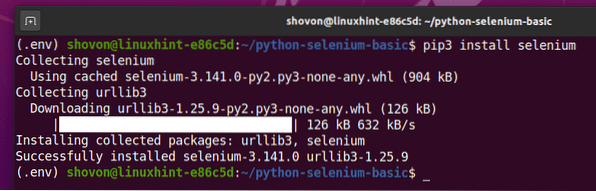
You can install this library using PIP 3, as follows:
$ pip3 install selenium
The Selenium Python library should now be installed.
Now that the Selenium Python library is installed, the next thing you have to do is install a web driver for your favorite web browser. In this article, I will show you how to install the Firefox and Chrome web drivers for Selenium.
Installing Firefox Gecko Driver
The Firefox Gecko Driver allows you to control or automate the Firefox web browser using Selenium.
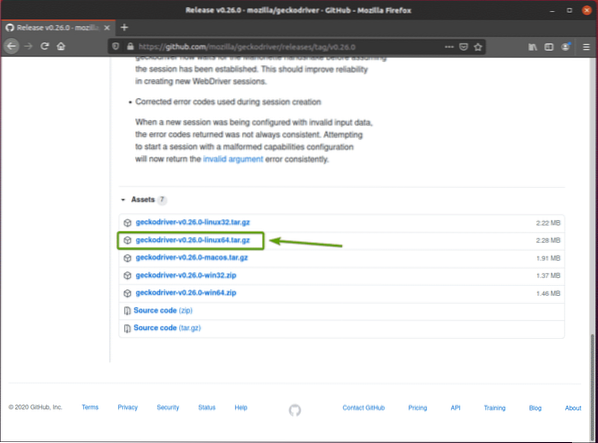
To download the Firefox Gecko Driver, visit the GitHub releases page of mozilla/geckodriver from a web browser.
As you can see, v0.26.0 is the latest version of the Firefox Gecko Driver at the time this article was written.
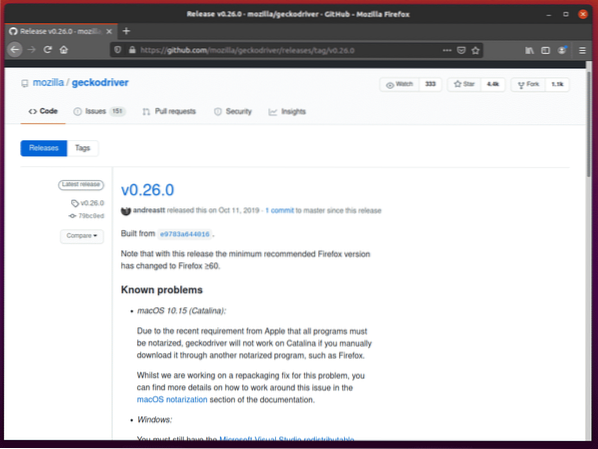
To download the Firefox Gecko Driver, scroll down a bit and click on the Linux geckodriver tar.gz archive, depending on your operating system architecture.
If you are using a 32-bit operating system, click the geckodriver-v0.26.0-linux32.tar.gz link.
If you are using a 64-bit operating system, click the geckodriver-v0.26.0-linuxx64.tar.gz link.
In my case, I will download the 64-bit version of the Firefox Gecko Driver.
Your browser should prompt you to save the archive. Select Save File and then click OK.
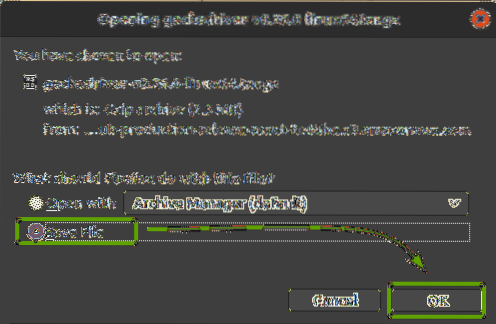
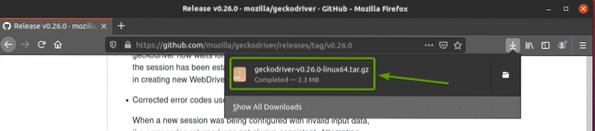
The Firefox Gecko Driver archive should be downloaded in the ~/Downloads directory.
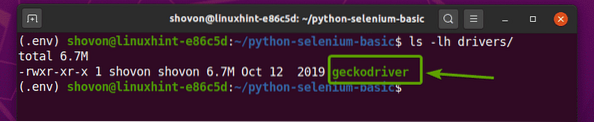
Extract the geckodriver-v0.26.0-linux64.tar.gz archive from the ~/Downloads directory to the drivers/ directory of your project by entering the following command:
$ tar -xzf ~/Downloads/geckodriver-v0.26.0-linux64.tar.gz -C drivers/
Once the Firefox Gecko Driver archive is extracted, a new geckodriver binary file should be created in the drivers/ directory of your project, as you can see in the screenshot below.
Testing Selenium Firefox Gecko Driver
In this section, I will show you how to set up your very first Selenium Python script to test whether the Firefox Gecko Driver is working.
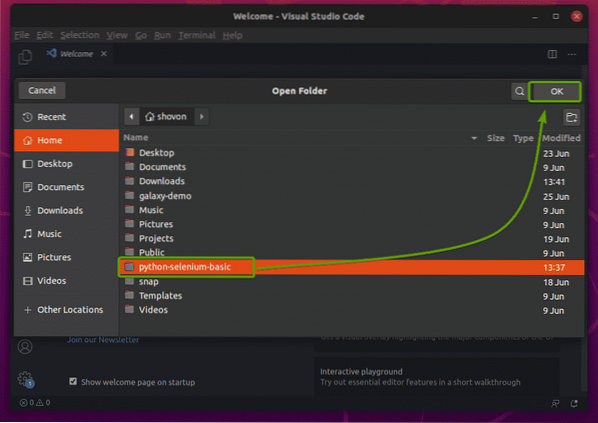
First, open the project directory python-selenium-basic/ with your favorite IDE or editor. In this article, I will use Visual Studio Code.
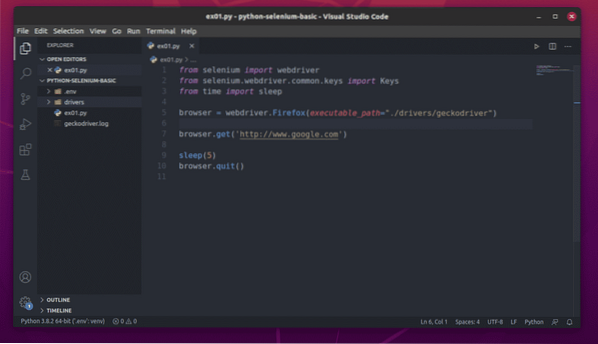
Create the new Python script ex01.py, and type the following lines in the script.
from selenium import webdriverfrom selenium.webdriver.common.keys import Keys
from time import sleep
browser = webdriver.Firefox(executable_path="./drivers/geckodriver")
browser.get('http://www.google.com')
sleep(5)
browser.quit()
Once you are done, save the ex01.py Python script.
I will explain the code in a later section of this article.
The following line configures Selenium to use the Firefox Gecko Driver from the drivers/ directory of your project.

To test whether the Firefox Gecko Driver is working with Selenium, run the following ex01.py Python script:
$ python3 ex01.py
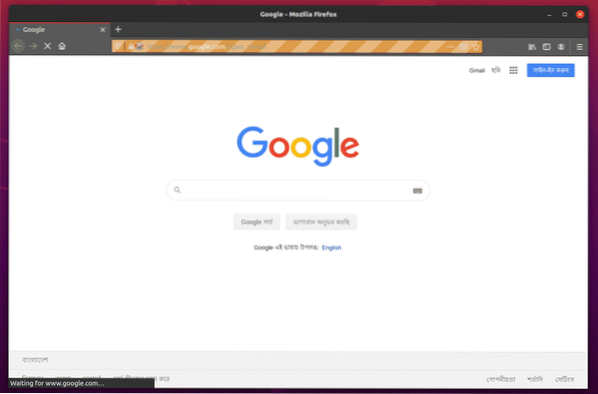
The Firefox web browser should automatically visit Google.com and close itself after 5 seconds. If this occurs, then the Selenium Firefox Gecko Driver is working correctly.
Installing Chrome Web Driver
The Chrome Web Driver allows you to control or automate the Google Chrome web browser using Selenium.
You must download the same version of the Chrome Web Driver as that of your Google Chrome web browser.
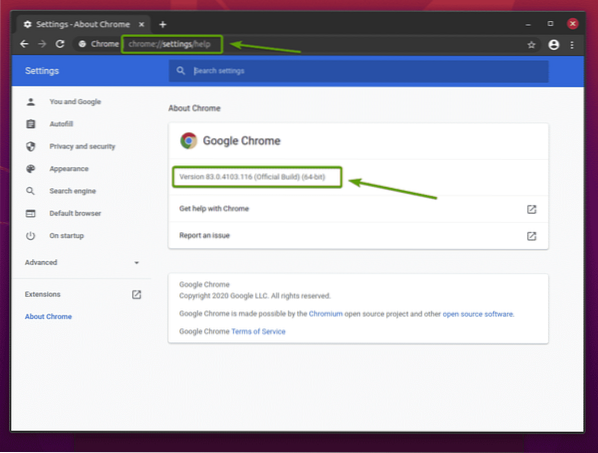
To find the version number of your Google Chrome web browser, visit chrome://settings/help in Google Chrome. The version number should be in the About Chrome section, as you can see in the screenshot below.
In my case, the version number is 83.0.4103.116. The first three parts of the version number (83.0.4103, in my case) must match the first three parts of the Chrome Web Driver version number.
To download Chrome Web Driver, visit the official Chrome Driver download page.
In the Current Releases section, the Chrome Web Driver for the most current releases of the Google Chrome web browser will be available, as you can see in the screenshot below.
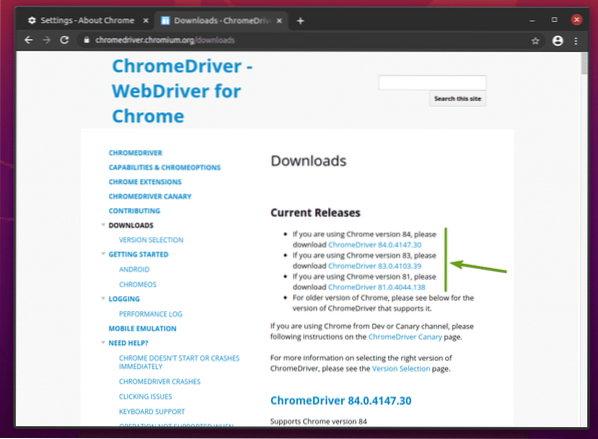
If the version of Google Chrome you are using is not in the Current Releases section, scroll down a little, and you should find your desired version.
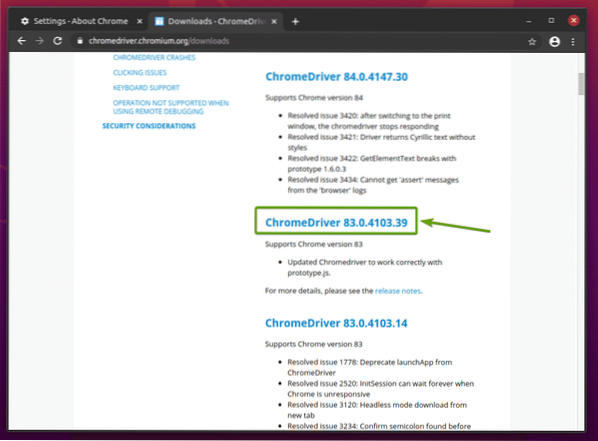
Once you click on the correct Chrome Web Driver version, it should take you to the following page. Click on the chromedriver_linux64.zip link, as notated in the screenshot below.
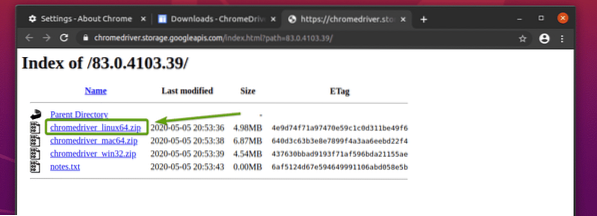
The Chrome Web Driver archive should now be downloaded.
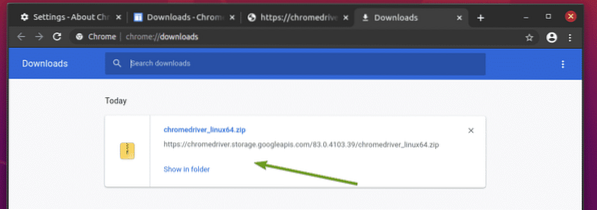
The Chrome Web Driver archive should now be downloaded in the ~/Downloads directory.
You can extract the chromedriver-linux64.zip archive from the ~/Downloads directory to the drivers/ directory of your project with the following command:
$ unzip ~/Downloads/chromedriver_linux64.zip -d drivers/
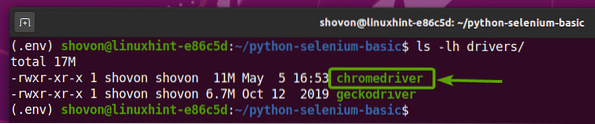
Once the Chrome Web Driver archive has been extracted, a new chromedriver binary file should be created in the drivers/ directory of your project, as you can see in the screenshot below.
Testing Selenium Chrome Web Driver
In this section, I will show you how to set up your very first Selenium Python script to test whether the Chrome Web Driver is working.
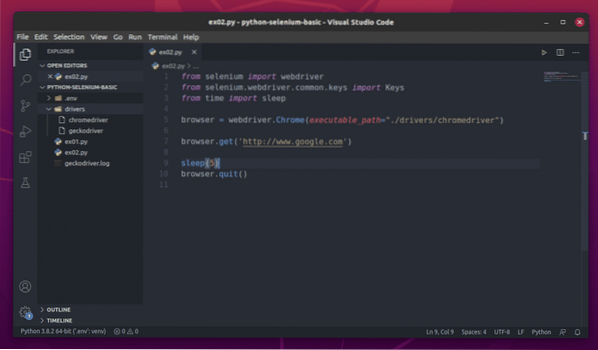
First, create the new Python script ex02.py, and type the following lines of codes in the script.
from selenium import webdriverfrom selenium.webdriver.common.keys import Keys
from time import sleep
browser = webdriver.Chrome(executable_path="./drivers/chromedriver")
browser.get('http://www.google.com')
sleep(5)
browser.quit()
Once you are done, save the ex02.py Python script.
I will explain the code in a later section of this article.
The following line configures Selenium to use the Chrome Web Driver from the drivers/ directory of your project.

To test whether the Chrome Web Driver is working with Selenium, run the ex02.py Python script, as follows:
$ python3 ex01.py
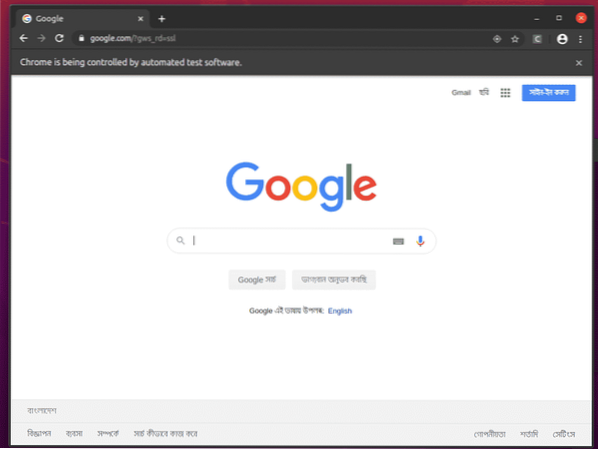
The Google Chrome web browser should automatically visit Google.com and close itself after 5 seconds. If this occurs, then the Selenium Firefox Gecko Driver is working correctly.
Basics of Web Scraping with Selenium
I will be using the Firefox web browser from now on. You can also use Chrome, if you would like.
A basic Selenium Python script should look like the script shown in the screenshot below.
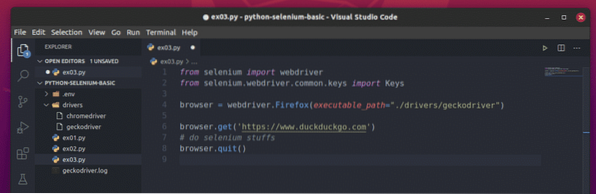
First, import the Selenium webdriver from the selenium module.

Next, import the Keys from selenium.webdriver.common.keys. This will help you send keyboard key presses to the browser you are automating from Selenium.

The following line creates a browser object for the Firefox web browser using the Firefox Gecko Driver (Webdriver). You can control Firefox browser actions using this object.

To load a website or URL (I will be loading the website https://www.duckduckgo.com), call the get() method of the browser object on your Firefox browser.

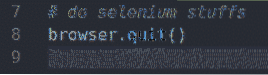
Using Selenium, you can write your tests, perform web scrapping, and finally, close the browser using the quit() method of the browser object.
Above is the basic layout of a Selenium Python script. You will be writing these lines in all of your Selenium Python scripts.
Example 1: Printing the Title of a Webpage
This will be the easiest example discussed using Selenium. In this example, we will print the title of the webpage we will be visiting.
Create the new file ex04.py and type the following lines of codes in it.
from selenium import webdriverfrom selenium.webdriver.common.keys import Keys
browser = webdriver.Firefox(executable_path="./drivers/geckodriver")
browser.get('https://www.duckduckgo.com')
print("Title: %s" % browser.title)
browser.quit()
Once you are done, save the file.
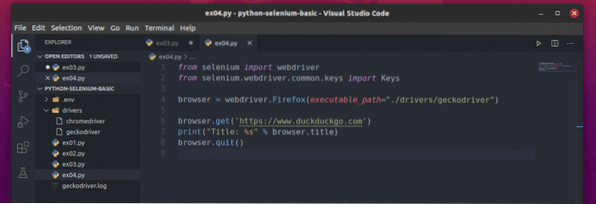
Here, the browser.title is used to access the title of the visited webpage and the print() function will be used to print the title in the console.

After running the ex04.py script, it should:
1) Open up Firefox
2) Load your desired webpage
3) Fetch the title of the page
4) Print the title on the console
5) And finally, close the browser
As you can see, the ex04.py script has printed the title of the webpage nicely in the console.
$ python3 ex04.py
Example 2: Printing the Titles of Multiple Webpages
As in the previous example, you can use the same method to print the title of multiple webpages using the Python loop.
To understand how this works, create the new Python script ex05.py and type the following lines of code in the script:
from selenium import webdriverfrom selenium.webdriver.common.keys import Keys
browser = webdriver.Firefox(executable_path="./drivers/geckodriver")
urls = ['https://www.duckduckgo.com', 'https://linuxhint.com', 'https://yahoo.com']
for url in urls:
browser.get(url)
print("Title: %s" % browser.title)
browser.quit()
Once you are done, save the Python script ex05.py.
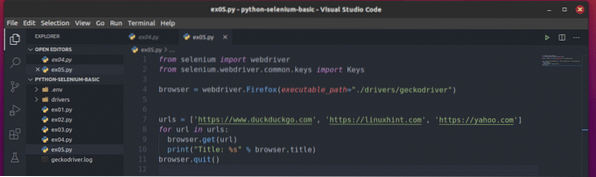
Here, the urls list keeps the URL of each webpage.

A for loop is used to iterate through the urls list items.
On each iteration, Selenium tells the browser to visit the url and get the title of the webpage. Once Selenium has extracted the title of the webpage, it is printed in the console.

Run the Python script ex05.py, and you should see the title of each webpage in the urls list.
$ python3 ex05.py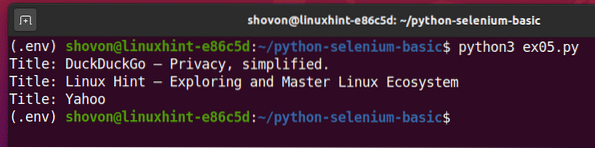
This is an example of how Selenium can perform the same task with multiple webpages or websites.
Example 3: Extracting Data from a Webpage
In this example, I will show you the basics of extracting data from webpages using Selenium. This is also known as web scraping.
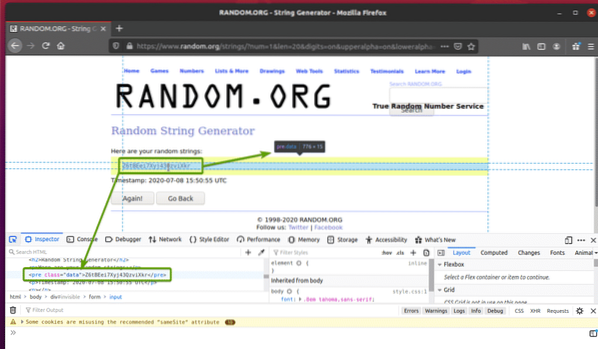
First, visit the Random.org link from Firefox. The page should generate a random string, as you can see in the screenshot below.
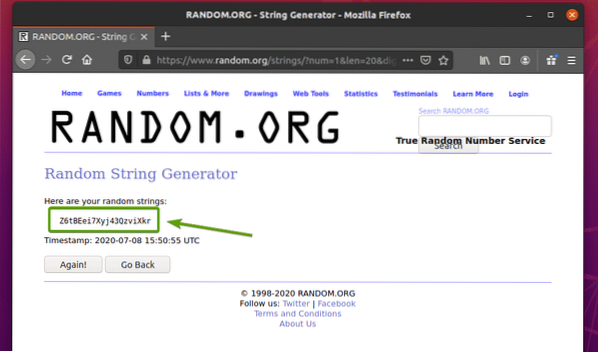
To extract the random string data using Selenium, you must also know the HTML representation of the data.
To see how the random string data is represented in HTML, select the random string data and press the right mouse button (RMB) and click on Inspect Element (Q), as notated in the screenshot below.
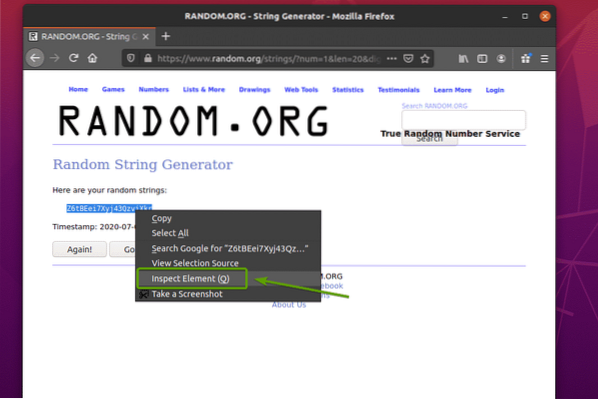
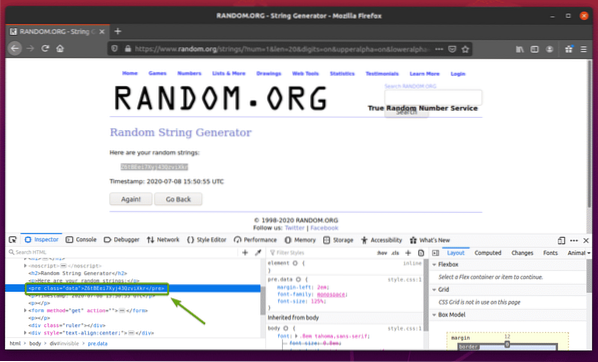
The HTML representation of the data should be displayed in the Inspector tab, as you can see in the screenshot below.
You can also click on the Inspect icon ( ) to inspect the data from the page.
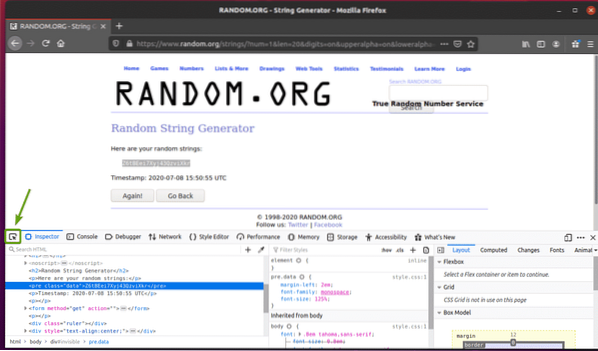
Click on the inspect icon ( ) and hover over the random string data that you want to extract. The HTML representation of the data should be displayed as before.
As you can see, the random string data is wrapped in an HTML pre tag and contains the class data.
Now that we know the HTML representation of the data we want to extract, we will create a Python script to extract the data using Selenium.
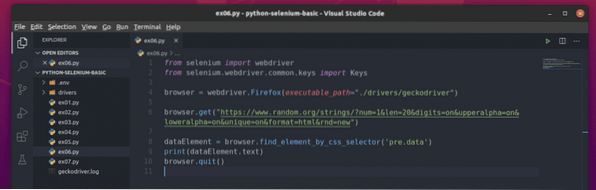
Create the new Python script ex06.py and type the following lines of codes in the script
from selenium import webdriverfrom selenium.webdriver.common.keys import Keys
browser = webdriver.Firefox(executable_path="./drivers/geckodriver")
browser.get("https://www.random.org/strings/?num=1&len=20&digits
=on&upperalpha=on&loweralpha=on&unique=on&format=html&rnd=new")
dataElement = browser.find_element_by_css_selector('pre.data')
print(dataElement.text)
browser.quit()
Once you are done, save the ex06.py Python script.
Here, the browser.get() method loads the webpage in the Firefox browser.

The browser.find_element_by_css_selector() method searches the HTML code of the page for specific a element and returns it.
In this case, the element would be pre.data, the pre tag that has the class name data.
Below, the pre.data element has been stored in the dataElement variable.

The script then prints the text content of the selected pre.data element.

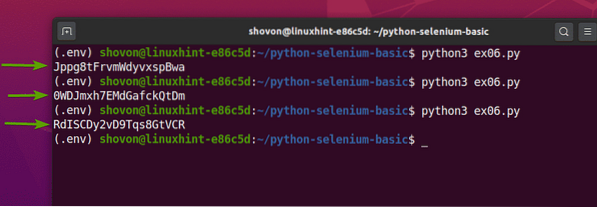
If you run the ex06.py Python script, it should extract the random string data from the webpage, as you can see in the screenshot below.
$ python3 ex06.py
As you can see, each time I run the ex06.py Python script, it extracts a different random string data from the webpage.
Example 4: Extracting List of Data from Webpage
The previous example showed you how to extract a single data element from a webpage using Selenium. In this example, I will show you how to use Selenium to extract a list of data from a webpage.
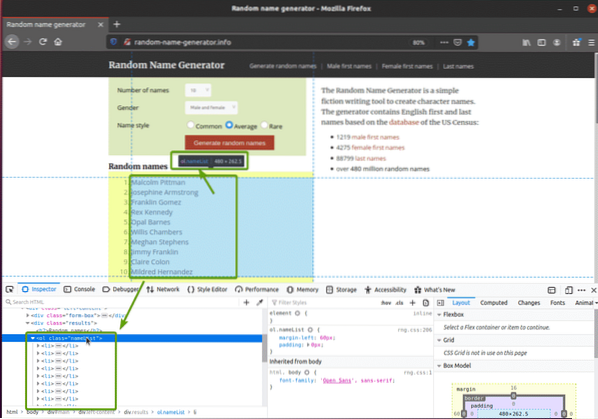
First, visit the random-name-generator.info from your Firefox web browser. This website will generate ten random names each time you reload the page, as you can see in the screenshot below. Our goal is to extract these random names using Selenium.
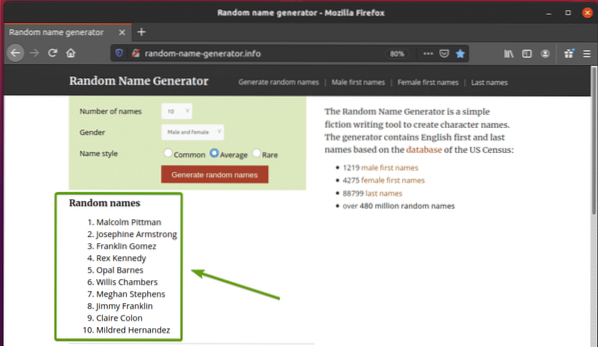
If you inspect the name list more closely, you can see that it is an ordered list (ol tag). The ol tag also includes the class name nameList. Each of the random names are represented as a list item (li tag) inside the ol tag.
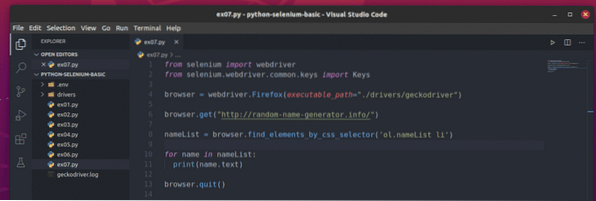
To extract these random names, create the new Python script ex07.py and type the following lines of codes in the script.
from selenium import webdriverfrom selenium.webdriver.common.keys import Keys
browser = webdriver.Firefox(executable_path="./drivers/geckodriver")
browser.get("http://random-name-generator.info/")
nameList = browser.find_elements_by_css_selector('ol.nameList li')
for name in nameList:
print(name.text)
browser.quit()
Once you are done, save the ex07.py Python script.
Here, the browser.get() method loads the random name generator webpage in the Firefox browser.

The browser.find_elements_by_css_selector() method uses the CSS selector ol.nameList li to find all li elements inside the ol tag having the class name nameList. I have stored all the selected li elements in the nameList variable.

A for loop is used to iterate through the nameList list of li elements. In each iteration, the content of the li element is printed on the console.

If you run the ex07.py Python script, it will fetch all the random names from the webpage and print it on the screen, as you can see in the screenshot below.
$ python3 ex07.py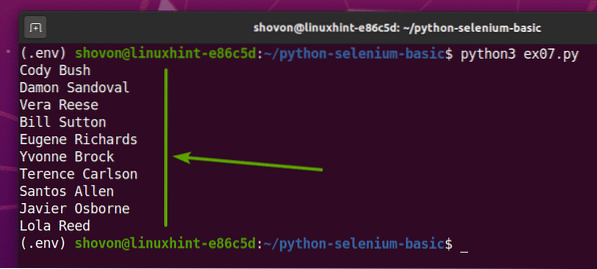
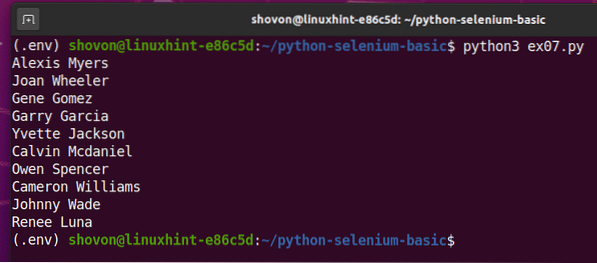
If you run the script a second time, it should return a new list of random user names, as you can see in the screenshot below.
Example 5: Submitting Form - Searching on DuckDuckGo
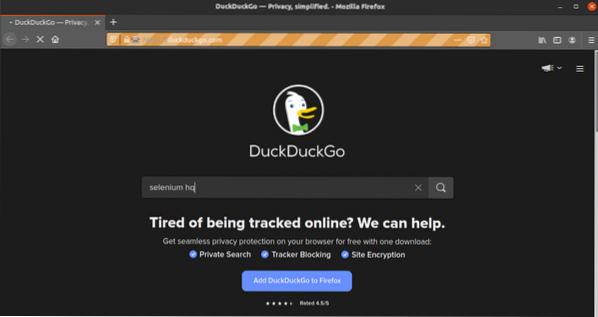
This example is just as simple as the first example. In this example, I will visit the DuckDuckGo search engine and search the term selenium hq using Selenium.
First, visit DuckDuckGo Search Engine from the Firefox web browser.
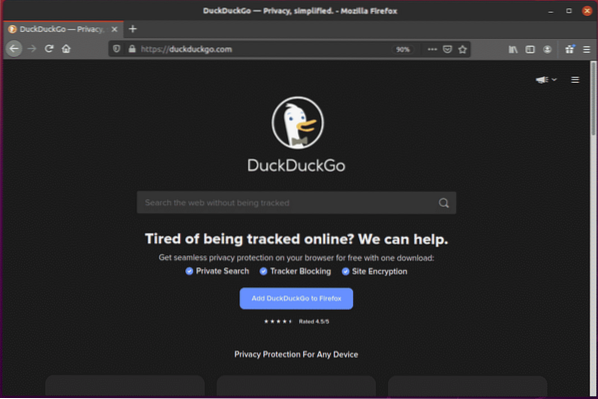
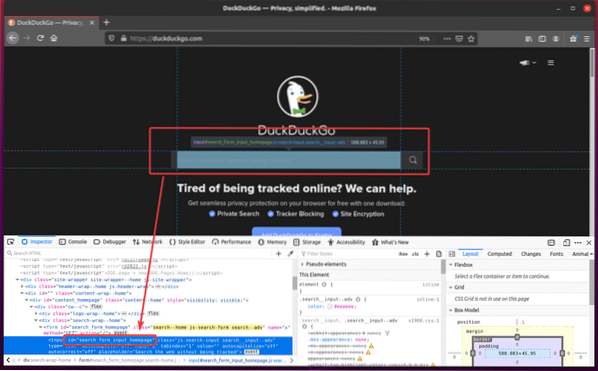
If you inspect the search input field, it should have the id search_form_input_homepage, as you can see in the screenshot below.
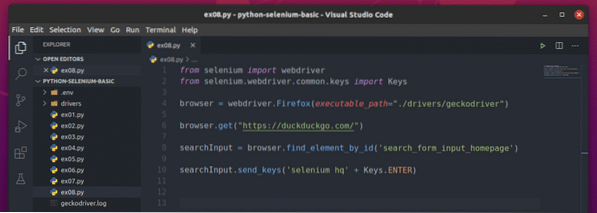
Now, create the new Python script ex08.py and type the following lines of codes in the script.
from selenium import webdriverfrom selenium.webdriver.common.keys import Keys
browser = webdriver.Firefox(executable_path="./drivers/geckodriver")
browser.get("https://duckduckgo.com/")
searchInput = browser.find_element_by_id('search_form_input_homepage')
searchInput.send_keys('selenium hq' + Keys.ENTER)
Once you are done, save the ex08.py Python script.
Here, the browser.get() method loads the homepage of the DuckDuckGo search engine in the Firefox web browser.

The browser.find_element_by_id() method selects the input element with the id search_form_input_homepage and stores it in the searchInput variable.

The searchInput.send_keys() method is used to send key press data to the input field. In this example, it sends the string selenium hq, and the Enter key is pressed using the Keys.ENTER constant.
As soon as the DuckDuckGo search engine receives the Enter key press (Keys.ENTER), it searches and displays the result.

Run the ex08.py Python script, as follows:
$ python3 ex08.py
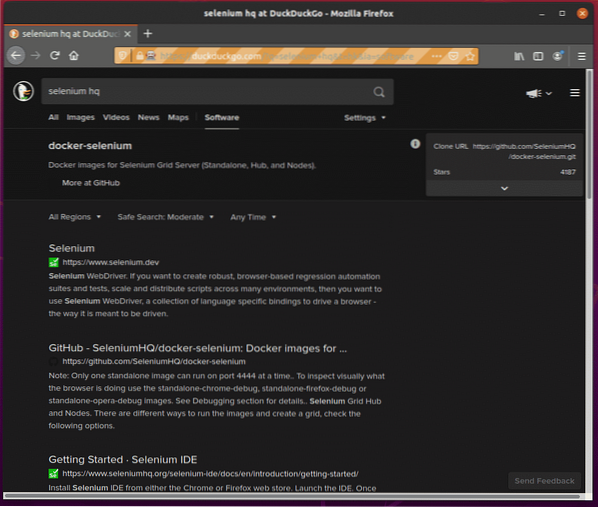
As you can see, the Firefox web browser visited the DuckDuckGo search engine.
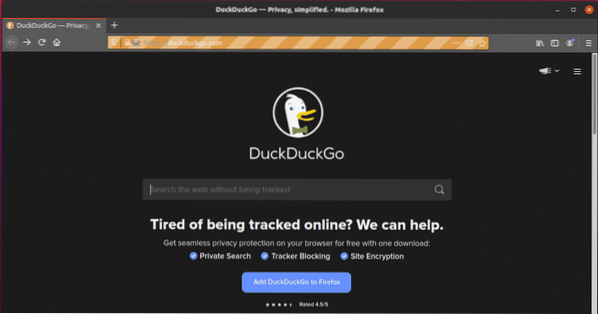
It automatically typed selenium hq in the search text box.
As soon as the browser received the Enter key press (Keys.ENTER), it displayed the search result.
Example 6: Submitting a Form on W3Schools.com
In example 5, DuckDuckGo search engine form submission was easy. All you had to do was press the Enter key. But this will not be the case for all form submissions. In this example, I will show you more complex form handling.
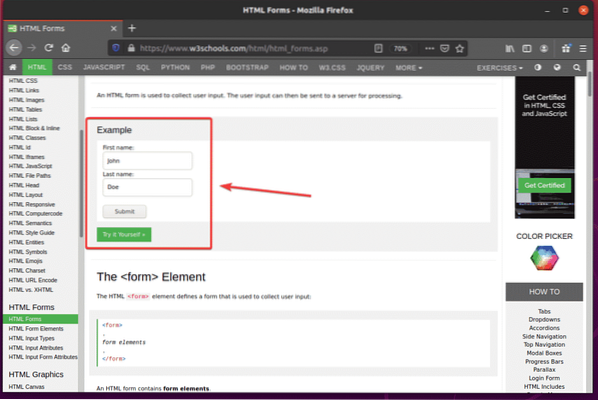
First, visit the HTML Forms page of W3Schools.com from Firefox web browser. Once the page loads, you should see an example form. This is the form we will submit in this example.
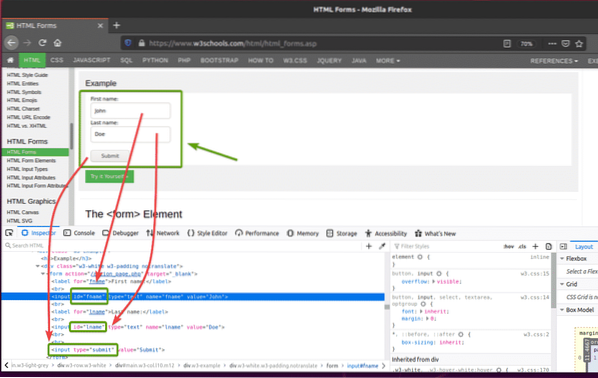
If you inspect the form, the First name input field should have the id fname, the Last name input field should have the id lname, and the Submit button should have the type submit, as you can see in the screenshot below.
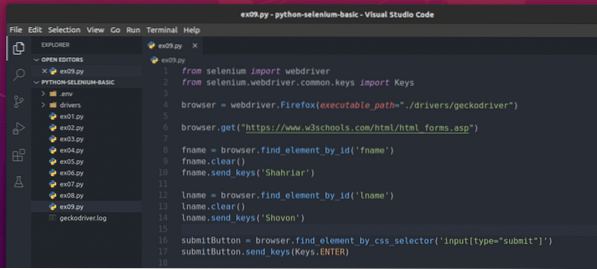
To submit this form using Selenium, create the new Python script ex09.py and type the following lines of codes in the script.
from selenium import webdriverfrom selenium.webdriver.common.keys import Keys
browser = webdriver.Firefox(executable_path="./drivers/geckodriver")
browser.get("https://www.w3schools.com/html/html_forms.asp")
fname = browser.find_element_by_id('fname')
fname.clear()
fname.send_keys('Shahriar')
lname = browser.find_element_by_id('lname')
lname.clear()
lname.send_keys('Shovon')
submitButton = browser.find_element_by_css_selector('input[type="submit"]')
submitButton.send_keys(Keys.ENTER)
Once you are done, save the ex09.py Python script.
Here, the browser.get() method opens up the W3schools HTML forms page in the Firefox web browser.

The browser.find_element_by_id() method finds the input fields by the id fname and lname and it stores them in the fname and lname variables, respectively.


The fname.clear() and lname.clear() methods clear the default first name (John) fname value and last name (Doe) lname value from the input fields.


The fname.send_keys() and lname.send_keys() methods type Shahriar and Shovon in the First name and Last name input fields, respectively.


The browser.find_element_by_css_selector() method selects the Submit button of the form and stores it in the submitButton variable.

The submitButton.send_keys() method sends the Enter key press (Keys.ENTER) to the Submit button of the form. This action submits the form.

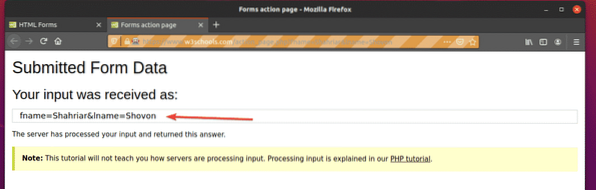
Run the ex09.py Python script, as follows:
$ python3 ex09.py
As you can see, the form has been automatically submitted with the correct inputs.
Conclusion
This article should help you get started with Selenium browser testing, web automation, and web scrapping libraries in Python 3. For more information, check out the official Selenium Python Documentation.

